The Two Changes That Actually Matter
Most gaming desk setup content is about how the desk looks — RGB placement, cable colors, panel lighting. Two changes matter more than all of that combined for anyone spending hours a day at the desk: getting the monitor to actual eye level, and getting cables out from underfoot and off the desk surface. Everything else on a typical setup checklist is a smaller improvement on top of these two.
Monitor Height: Why a Stand Isn't Enough
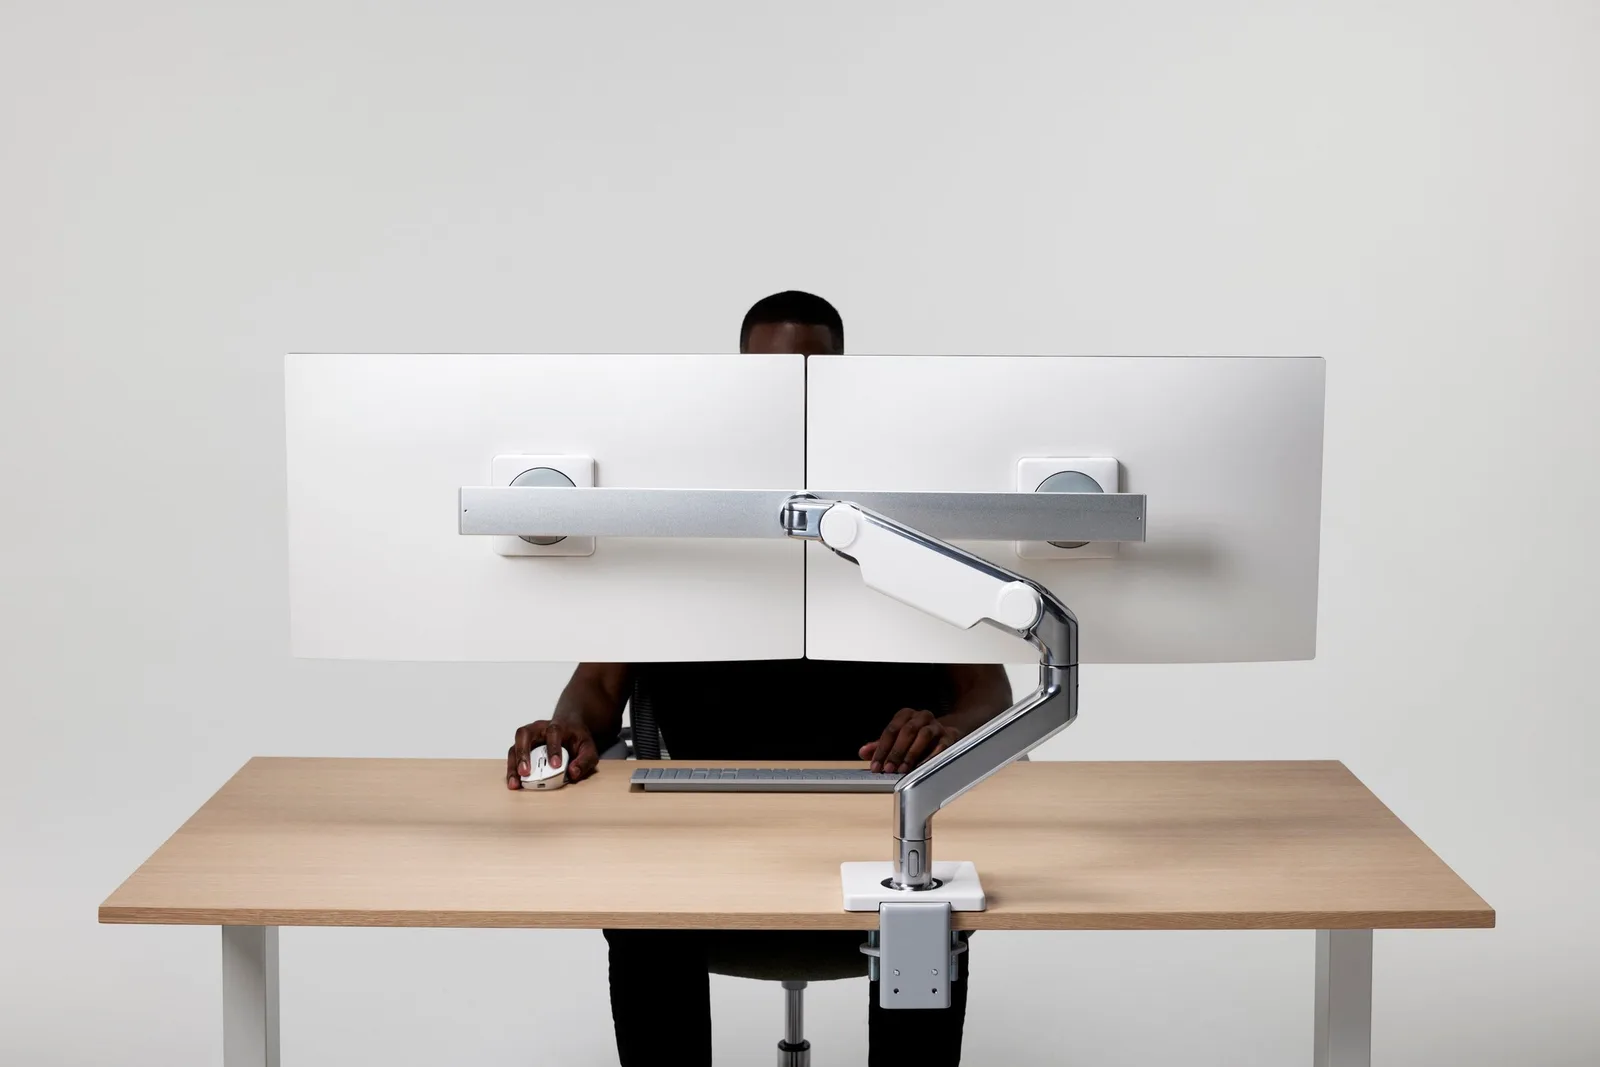
A monitor sitting on its stock stand sits too low for most people, forcing a slight downward neck tilt that compounds over a full day into real strain. The fix isn't a stack of books — it's a monitor arm, which gets the screen to actual eye level and, as a side effect, frees up the desk surface underneath it.
Ergotron LX is the arm most independent testers land on for a reason: it holds monitors up to 34 inches and 22 lbs, stays smooth and tool-free to adjust day to day, and comes with a 10-year warranty — the kind of detail that matters when a cheap arm's spring mechanism wears out within a year and starts drooping under a monitor's weight. It runs around $209.
If budget is the constraint, the North Bayou F80 is the mechanical-arm alternative worth trusting — over 17,000 reviews averaging 4.5/5 stars is a real signal for a category where cheap arms are notorious for early failure. One general warning worth passing on: monitor arms under roughly $35 that skip a proper gas-piston or spring mechanism are a common source of the drooping/sagging complaint — a slightly higher budget in this specific category buys real reliability, not just a nicer finish.
Cable Management That Actually Gets Maintained
Cable management systems fail for a predictable reason: they require redoing every time a cable changes, so anything complicated gets abandoned within a month. The setups that stay clean long-term use a small number of durable fixes rather than an elaborate one-time project:
- An under-desk cable tray mounted to the rear edge holds power strips and adapters off the floor, out of sight, without needing to be touched when you add a new device.
- Velcro straps (not zip ties) for bundling cables that run together — Velcro lets you add or remove a cable later without cutting anything.
- A single cable grommet or clip at the point where cables drop from desk to floor, so they don't drag or catch on chair wheels.
That's the actual list. Elaborate raceways and fully hidden cable runs look great in a photo and are the first thing abandoned the next time a peripheral gets swapped.
Chair and Desk Height Work Together
A monitor arm and clean cables solve the top half of the setup; the chair solves the rest, and it's worth getting the order right — chair height should be set first (forearms roughly level with the desk surface), then monitor height gets set relative to seated eye level, not the other way around. If lower back pain specifically is a concern, our breakdown of what actually helps covers the chair side of this in more depth than fits here.
The Practical Order to Do This In
- Set chair height and lumbar support first.
- Add a monitor arm and set screen height relative to seated eye level.
- Route cables with a tray, Velcro, and one grommet point — resist the urge to over-engineer this step.
Skip the RGB and panel lighting until these three are actually done — they're the part of a setup that gets photographed, not the part that prevents a stiff neck by week three.
 Reviews
NTE: Neverness to Everness Review (2026): Worth Playing?
Hotta Studio followed Tower of Fantasy with a bigger, stranger open world. Six months after launch, here's an honest look at what Neverness to Everness actually gets right — and where it doesn't.
 News
NewsSteam Deck 2: Valve Says It's Close, One Issue Left
No release date yet — but Valve confirms Steam Deck 2 is real and 'getting there.' Here's the exact chip problem holding it back, and what to buy today instead.
 News
NewsROG Xbox Ally X20 Preorders Are Live: OLED Screen, $1,299.99, October 15 Launch
Preorders for the ROG Xbox Ally X20 opened August 25, bringing the first true OLED screen to ASUS's handheld lineup. Here's what actually changed, the price, and what to know before you commit.